Your First XML API Calls
- Prerequisites
- Learn about Postman
- Install Postman
- Create an environment and define global variables
- Get the tutorial collection
- Get an API session
- Get information about objects
- Get all fields for an object type
- Create an object
- Delete an object
- Configure slide in (passthrough) authentication
- Sage Intacct API collection for Postman (DOWNLOAD)
This tutorial shows you how to send your first XML API calls to the Web Services gateway using the Postman application.
Postman is a popular API test tool that lets you send HTTP requests to a server and review the responses.
Already familiar with Postman and Web Services? Skip the tutorial and download the API collection for Postman:
Prerequisites
-
You must have a Web Services developer license, which includes a Web Services sender ID. If you need a developer license, contact your account manager.
-
The company to which you will be sending API calls must authorize your sender ID.
-
You must have login credentials for the company, and it is strongly recommended that you use a Web Services user. See Web Services users in the Sage Intacct product help for details.
-
If you haven’t already done some preliminary reading, consider looking at the Web Services overview before continuing.
Learn about Postman
Before getting started, it’s helpful to understand some of the capabilities of Postman.
Postman lets you create environments to store frequently used settings for your requests. You can also create global variables that apply across all your environments. Finally, you can create a collection of commonly-used requests that rely on these variables.
This tutorial will show you how to store your Web Services credentials and the gateway endpoint as global variables, then create an environment for your company that stores your login credentials and other information. You will then import a collection of requests and modify/run them.
Install Postman
Postman is available as a Chrome app or a full packaged application—using the full application is recommended.
-
Download the installer for your platform and run it.
The sign-in dialog appears.
-
You can simply open the application, but it is strongly recommended that you either sign in or create an account if you don’t already have one.
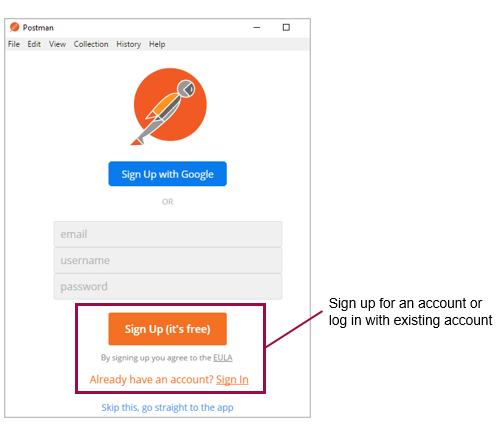
Warning: If you update a collection and sign up/log in after that point, you run the risk of losing your work.
Create an environment and define global variables
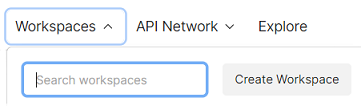
-
On the top left of Postman, click the Workspaces drop-down and select Create Workspace.
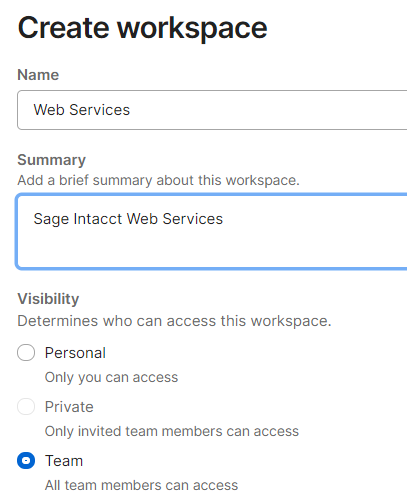
-
Give your new workspace a name, and select the appropriate Visibility for your project.
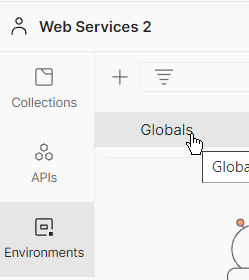
-
In the new workspace, click Environments and then click Globals to set global variables.
-
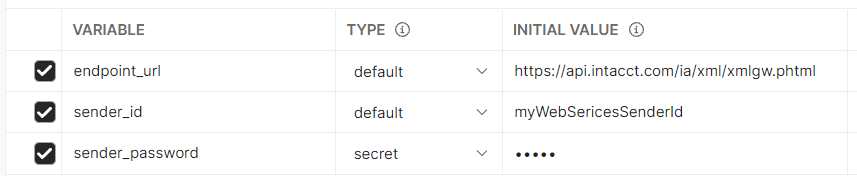
Create these global variables with your Web Services sender ID and password. Both values are case-sensitive.
-
Close the Globals tab and save your changes.
-
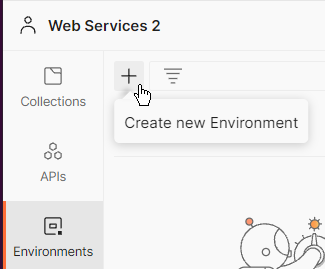
Click Environments, then click + to add a new environment to your workspace.
-
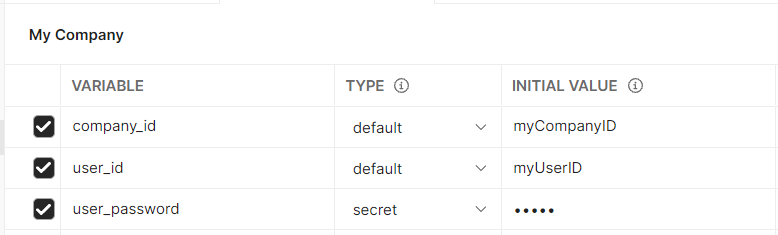
Give your environment an intuitive name and set these environment variables:
-
Close the environment tab and save your changes.
-
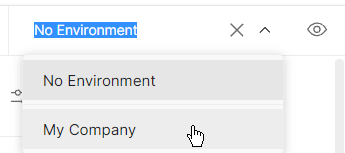
Select the new environment from the drop down menu in the top right corner.
Note: See the Postman docs for more usage information.
Get the tutorial collection
The requests used in this tutorial are available as a Postman collection.
-
Click the button to load the tutorial collection into Postman:
-
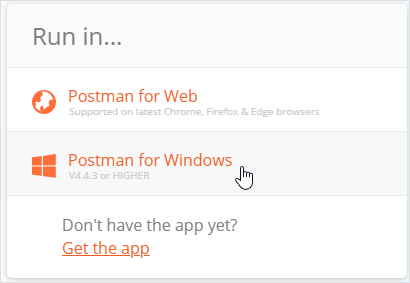
Choose how you want to open the collection, for example:
-
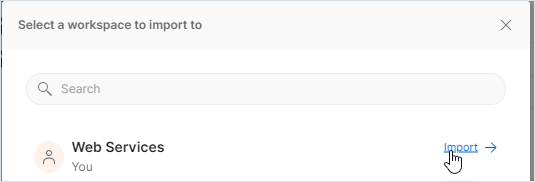
Select your new workspace to import into:
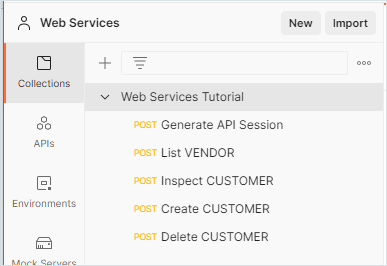
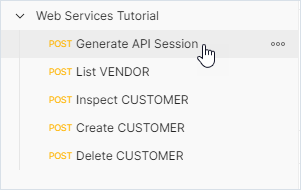
The Web Services Tutorial collection loads:
Alternatively, you can manually import the collection (the end result is the same):
-
Download the collection, which is in a JSON file.
Note: If you have trouble downloading, try a browser other than Chrome.
-
Open the File menu and click Import, then choose the
your-first-api-calls.jsonfile you downloaded.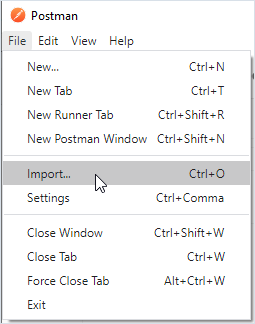
Get an API session
When working with production code, you should always send a getAPISession request to get a session ID and unique
endpoint for your interaction. The tutorial collection includes a request that does this.
-
Click Generate API Session from the collection.
-
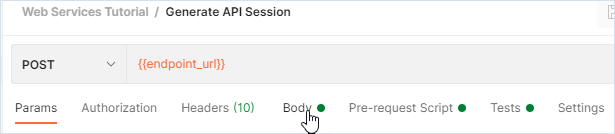
Click Body to view the request.
-
Examine the request and consider the following:
-
Instances of company environment variables are used in the request (highlighted in yellow).
-
The request uses a POST command with the
endpoint_urlvariable as the target endpoint. -
Instances of Postman dynamic variables are used for control IDs (highlighted in blue).
-
The
dtdversionis set to 3.0, which is the recommended version. This version provides a set of generic API functions for basic operations likecreate,read,deleteand provides object-specific functions.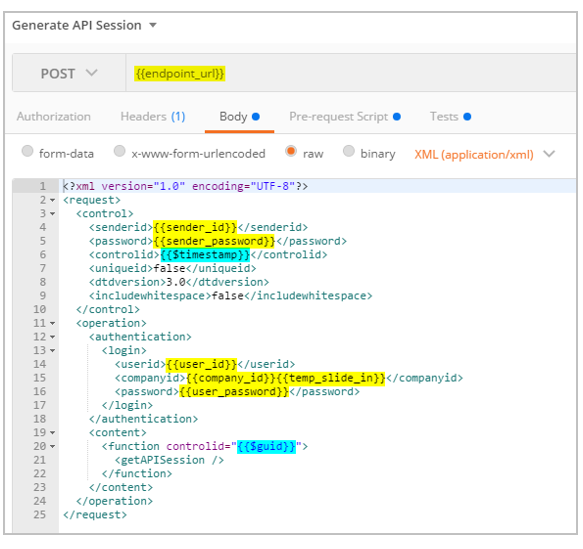
-
You can ignore
temp_slide_infor now—this optional variable is described below.
See XML Requests for more details about the parts of a request.
-
-
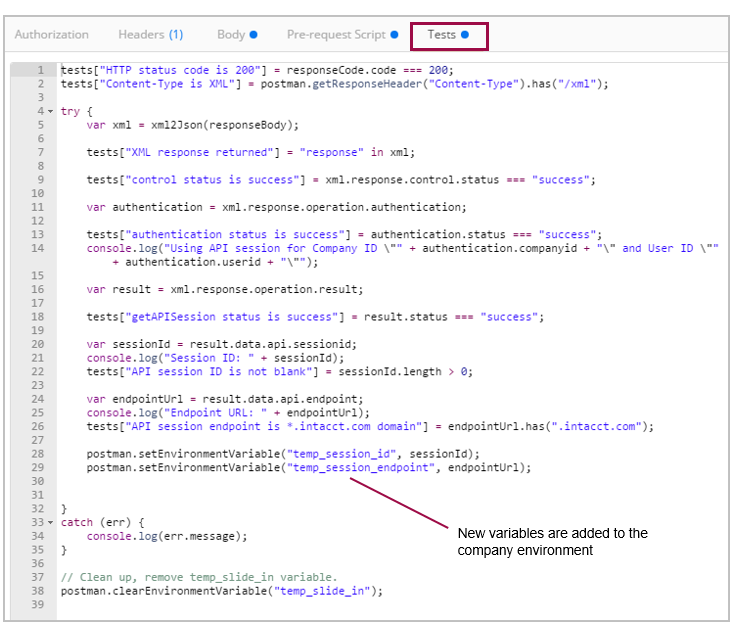
Click Tests to show the post-request scripts that will gather information from the gateway response.
The script captures the session ID and endpoint from the response and adds these variables to the company environment.
-
Click Send on the upper right to post the request.

The XML response from the gateway displays at the bottom of the window. Note the session ID and endpoint returned in the result.

-
Open your company environment again and confirm that the following variable has been added and initialized.
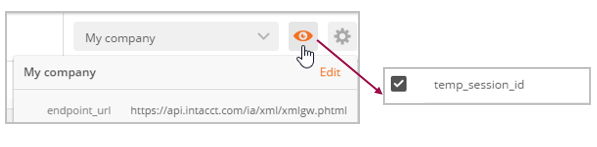
-
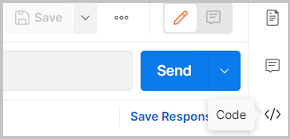
To view the code snippet for your request, click the code icon </> on the upper right.
Get information about objects
Note: As you work with objects, keep in mind that Sage Intacct does not support special characters in the XML API.
Now that everything is set up, let’s get some information about objects in our company.
-
Click List VENDOR from the collection, then click Body and examine the request.
-
The authentification element for the request will use the captured session ID.
-
The content element includes a
readByQuerycall onVENDOR.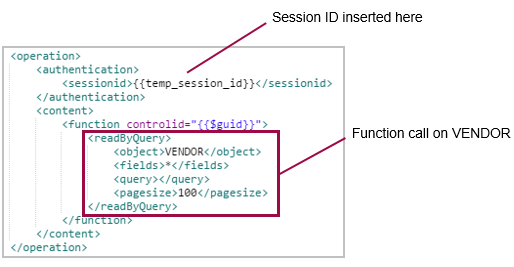
-
-
Click Send to post the request.
Assuming there are
VENDORobjects in your company, you will see a maximum of 100 vendor objects listed in the response. Note the name of one of the returned vendors.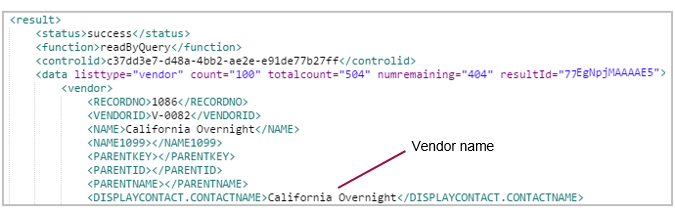
-
Add a query to the function in the request body (at the top) to seek a
VENDORobject based on its name, for example: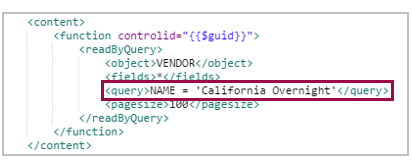
-
Click Send and examine the response.
-
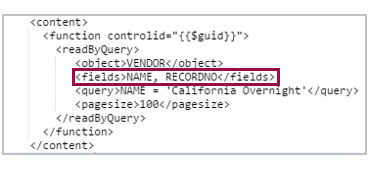
Limit the query response to include only specific fields by changing the request body and resending, for example:
-
Click Send and examine the response.
Tip: Do you want to save your changes to the request? Use Save > Save As in the upper right.
Get all fields for an object type
-
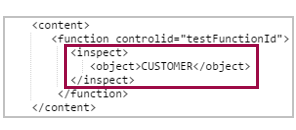
Click Inspect CUSTOMER from the collection, then click Body to view the request:
-
Click Send and examine the results.
The response shows all the available fields for the object type, but does not include field attributes, which is where object data is stored.
-
Add
details="1"to the request body to get the field attributes: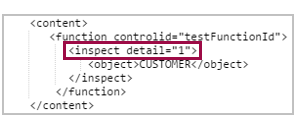
-
Send the request to see each field with its attributes.
Create an object
Let’s create a test CUSTOMER object.
-
Click create CUSTOMER from the collection, then click Body to view the request. Note the nested
<create><CUSTOMER>elements that specify the function: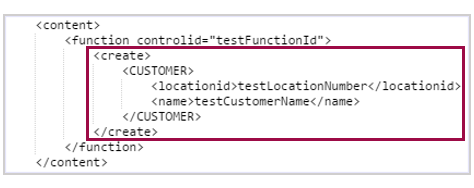
-
Click Send and view the response.
Note the
RECORDNOvalue for the new customer. This is the record number that is assigned by the system to uniquely identify the object.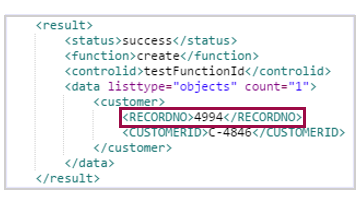
Delete an object
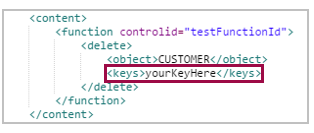
Now let’s delete the test CUSTOMER. In order to delete a standard object, you use its record number as the key.
-
Click delete CUSTOMER from the collection, then click Body to view the request:
-
Modify the request by providing the record number that was assigned for your
CUSTOMERobject as the keys value. -
Click Send and view the response.
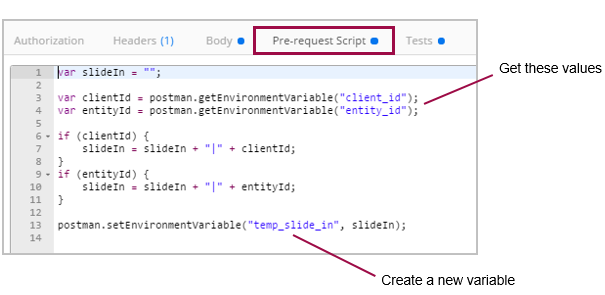
Configure slide in (passthrough) authentication
You can provide separate client_id and entity_id variables in your Postman environment. The Generate API Session command includes code in its pre-request script to handle these variables for you. The script uses the client_id and entity_id from the company environment to create the temp_slide_in value, which is then used when getting the session.
Sage Intacct API collection for Postman (DOWNLOAD)
You can download the Sage Intacct API collection, which provides a set of API functions (by application) that you can modify and use.
Extract the zip file and import the collection into Postman.
If you plan on modifying any collection in Postman, make sure you log in first or you might lose your work. Also, If you change any of the calls in the collection, rename them if you don’t want them overwritten when re-importing the collection at a later time.